Create an Ikasumi ERC-1155 Advanced NFT Marketplace
Use the Smart Contract Wizard
If you are not sure what flavor or network is the best for you, use the WP Smart Contracts wizard
Read more
NFT Collection data
The first step is to create a NFT is to fill the basic data:
The title of your collection
The full description of your NFT collection, you can include images, font styles, etc.
Set the featured image for your collection as a regular featured image of a WordPress post
Skin
The skin is how your NFT Marketplace looks
This setting is located in the WP Smart Contracts setting
Smart Contracts Options
This section is the Smart Contract definition data
Just like ERC-20 has a symbol and names, ERC-1155 tokens also have a symbol and a name. This symbol and name is a one-time setting, cannot be changed after deployment.
Percentage commission, ranging from 0 to 100. Commission that you are going to get from Sales. 0 means no commission, 100 means 100% of the sale as commission.
Percentage royalty, ranging from 0 to 100. Royalties to the creators from resales. 0 means no commission, 100 means 100% of the sale as commission.
Ethereum address or EVM compatible wallet address to receive funds. This is the beneficiary account that will receive the Marketplace commissions in the native coin of the blockchain selected
Standard ERC-20 or BEP20 token to be used for payment of sales
Please note that all payments made through the Ikasumi Smart Contract are made in ERC-20 / BEP-20 tokens.
This has to be the 42-character hexadecimal address (like 0x0123456789abcde0123456789abcde0123456789).
Warning!
Are you using a reflection token? If so, you must exclude the NFT contract in your reflection token
You can use any token compatible with the ERC-20 Standard
The payment token can be:
- Your own token
- A wrapped coin token
- Any other token
Using your own token
If you have created your own token, using the WP Smart Contracts or any other tool, you can use it for of payment as long as it is ERC-20 Standard compatible
Disclaimer
WPSmartContracts.com does not endorse or promote any of the following tokens, we display it for technical education and demonstration purposes only. We are not responsible for the accuracy or stability of this information. DO YOUR OWN RESEARCH and neccesary verifications on your side.
Using a wrapped version of the native coin
If you want to use Ether (for Ethereum), BNB (for BSC), Matic (for Polygon), you have to use a wrapped token like:
Using other tokens
Any token compatible with the standard ERC-20 / BEP-20 can be used as a form of payment.
Any well-known Standard token in the industry, for example
Ethereum Tokens
Binance Smart Chain Tokens
Polygon Chain Tokens
Keep in mind that you need to use a token existing in the Blockchain you choose. For example, you cannot use on the testnet a token that exists on the mainnet. If you are using a testnet we recommend to create your own token using the plugin.
Options
This is a smart contract setup. If anyone can mint it means that anyone can create a NFT item on your Marketplace. Otherwise, only the contract owner can mint new NFT items.
This is a WordPress level configuration. Choose the WP user roles authorized to create NFT elements, both in the Backend and the Frontend of your site.
This is a frontend setting to allow all creators to modify the data for all items. By default, NFT items can be modified by their authors, but if you want all authors to be able to modify all NFT elements, activate this option. (Not recommended)
If your contract is deployed to Ethereum mainnet or Polygon mainnet, an auto-generated link to OpenSea will be displayed in the item view
By default, each browser will render images using aliasing to a scaled image in order to prevent distortion. Check this if you want the image to preserve its original pixelated form. This is usefull if your items are icon-like images
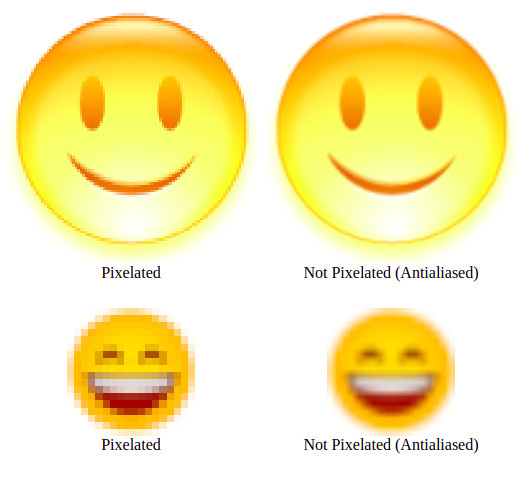
Examples of pixelated and atialiased images
By default, galleries are not enabled, you can enabled them selecting one of two choices
No galleries will be used in your collection
Your galleries will be show on the top as "Tabs"
Your galleries will be show on the top as a dropdown list
NFT Collection Deploy
Then you can deploy your contract
In the bottom left section of the screen you can click on "Expand All" in the network section to see all blockchains available to deploy the selected flavor. Available networks vary from one flavor to another.
In the bottom section you can click on checkboxes to filter your networks results by mainnet, testnets, Ethereum Bitcoin, etc.
Click on "Switch" on the desired networks to add this network to your Metamask and switch to it
Deployment and gas fees are paid using the native coin of the selected network, meaning that if you chose Ethereum you will pay in Ether, if you chose Polygon you will pay in Matic, etc. You will see the price in the native coin and the estimated equivalent in US Dollars in the top left of the networks section.
Basically you need to know what you are doing and to know that this actions is irreversible.
Learn more about all available networks
Read more