
Prepare to be amazed!
🎩 Protect keys & info.
NFT Item
Prepare to be amazed!
🎩 Protect keys & info.
Massive or batch or bulk minting is the process to create multiple items on the same transaction, this facilitates the process of large collections with thousands of items.
Create a collection and run a batch mint process, full tutorial
You can use the Batch Mint NFTs wizard available from:
In general the process to do a batch minting process is the following
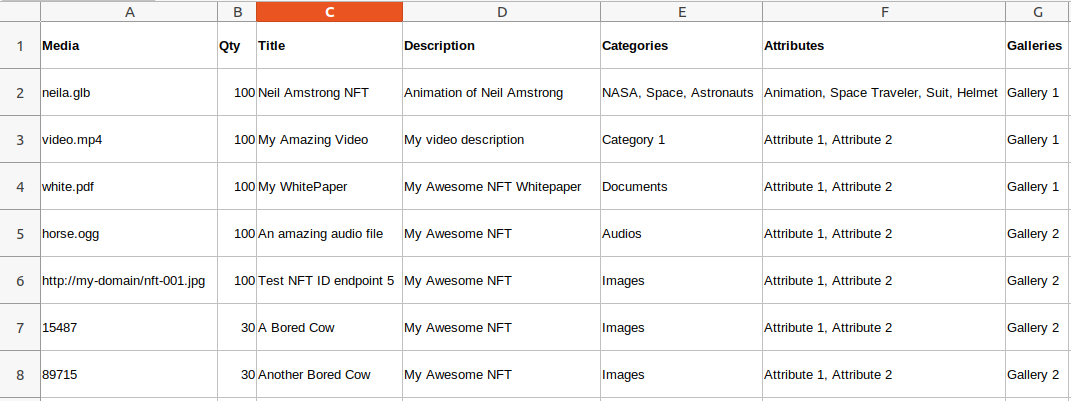
Let's start with the CSV file configuration
The CSV file should contain all the data for your NFT creation, this will feed the wizard and it will automatically create and mint all NFTs using the information contained in the CSV file.
The structure of the CSV file is:
[your-wordpress-path]/wp-content/uploads/wpsc
neila.glb;...
video.mp4;...
white.pdf;...
http://my-domain/nft-001.jpg
15487;...
89715;...
1548;...
neila.glb;100;...
video.mp4;100;...
white.pdf;100;...
neila.glb;100;Neil Amstrong NFT;...
video.mp4;100;My Amazing Video;...
white.pdf;100;My WhitePaper;...
neila.glb;100;Neil Amstrong NFT;Animation of Neil Amstrong;...
video.mp4;100;My Amazing Video;My video description;...
white.pdf;100;My WhitePaper;My Awesome NFT Whitepaper;...
neila.glb;100;Neil Amstrong NFT;Animation of Neil Amstrong;NASA, Space, Astronauts;...
video.mp4;100;My Amazing Video;My video description;;Category 1;...
white.pdf;100;My WhitePaper;My Awesome NFT Whitepaper;Documents;...
neila.glb;100;Neil Amstrong NFT;Animation of Neil Amstrong;NASA, Space, Astronauts;Animation, Space Traveler, Suit, Helmet
video.mp4;100;My Amazing Video;My video description;Category 1;Attribute 1, Attribute 2
white.pdf;100;My WhitePaper;My Awesome NFT Whitepaper;Documents;Attribute 1, Attribute 2
horse.ogg;100;An amazing audio file;My Awesome NFT ;Audios;Attribute 1, Attribute 2
http://my-domain/nft-001.jpg;100;Test NFT ID endpoint 5;My Awesome NFT ;Images;Attribute 1, Attribute 2
15487;30;A Bored Cow;My Awesome NFT ;Images;Attribute 1, Attribute 2
89715;30;Another Bored Cow;My Awesome NFT ;Images;Attribute 1, Attribute 2
neila.glb;100;Neil Amstrong NFT;Animation of Neil Amstrong;NASA, Space, Astronauts;Animation, Space Traveler, Suit, Helmet;Gallery 1
video.mp4;100;My Amazing Video;My video description;Category 1;Attribute 1, Attribute 2;Gallery 1
white.pdf;100;My WhitePaper;My Awesome NFT Whitepaper;Documents;Attribute 1, Attribute 2;Gallery 1
horse.ogg;100;An amazing audio file;My Awesome NFT ;Audios;Attribute 1, Attribute 2;Gallery 2
http://my-domain/nft-001.jpg;100;Test NFT ID endpoint 5;My Awesome NFT ;Images;Attribute 1, Attribute 2;Gallery 2
15487;30;A Bored Cow;My Awesome NFT ;Images;Attribute 1, Attribute 2;Gallery 2
89715;30;Another Bored Cow;My Awesome NFT ;Images;Attribute 1, Attribute 2;Gallery 2
As said before the Batch Mint process consists of four steps:
Let's check them one by one
In this step you will load your CSV file to a selected collection

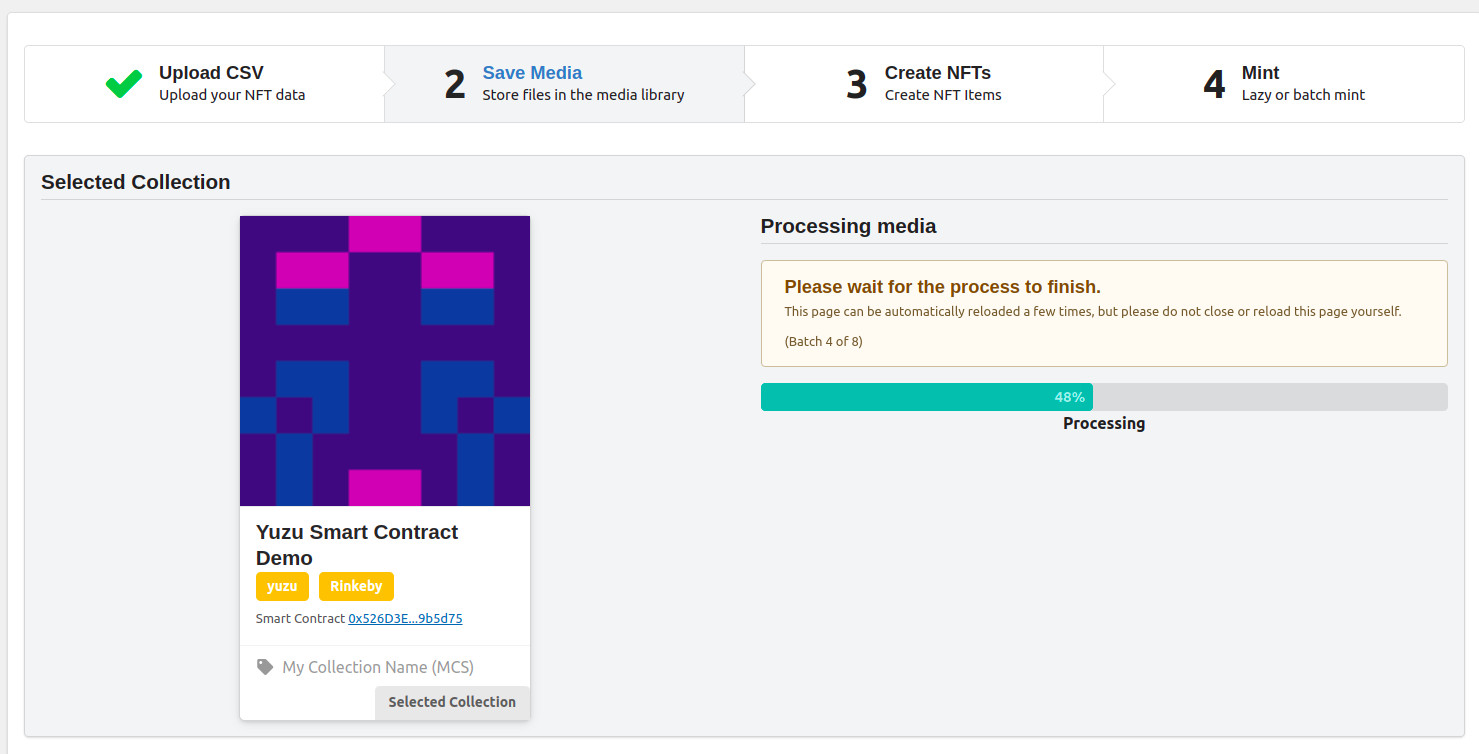
Then the wizard will automatically load all the images to your WordPress uploads folder
The page may automatically reload several times, please be patient, do not reload the page yourself and do not close the browser. Wait for the process to finish.
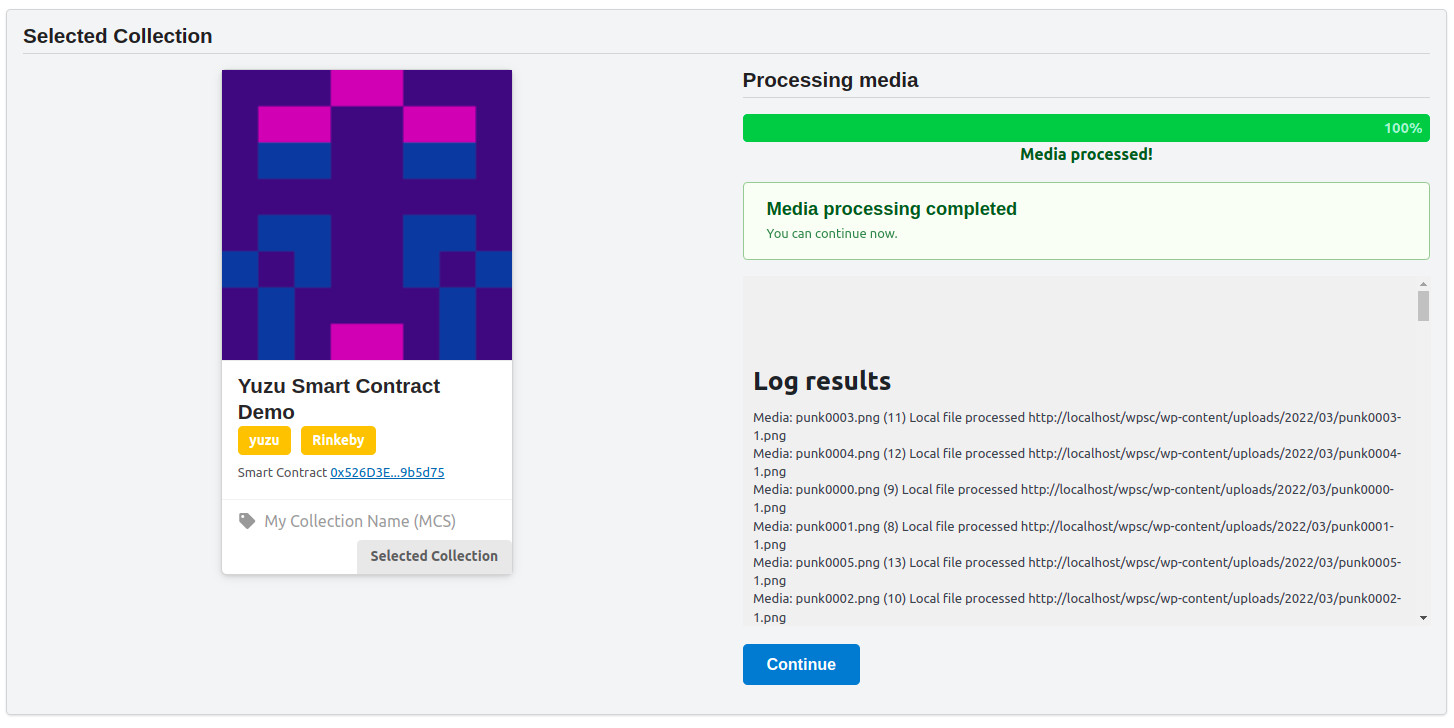
When finished, the log with all the results will be displayed, look for the errors in this log, they are highlighted in red, if an error occurred with any media file, you can fix the media on your side and restart the process again with the CSV file.
When successful, continue to the next step.
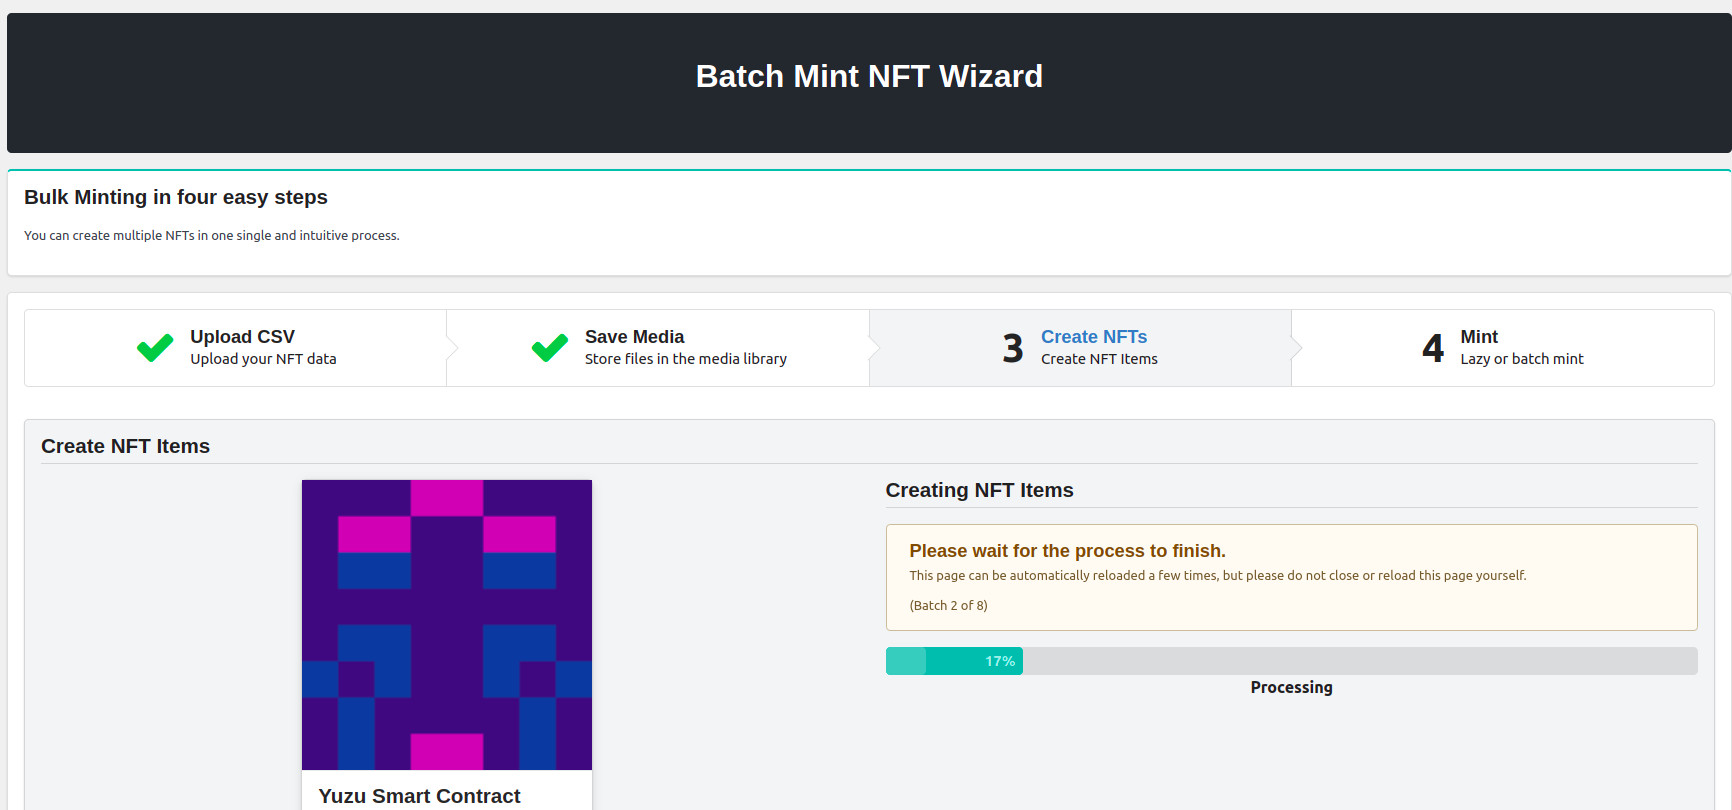
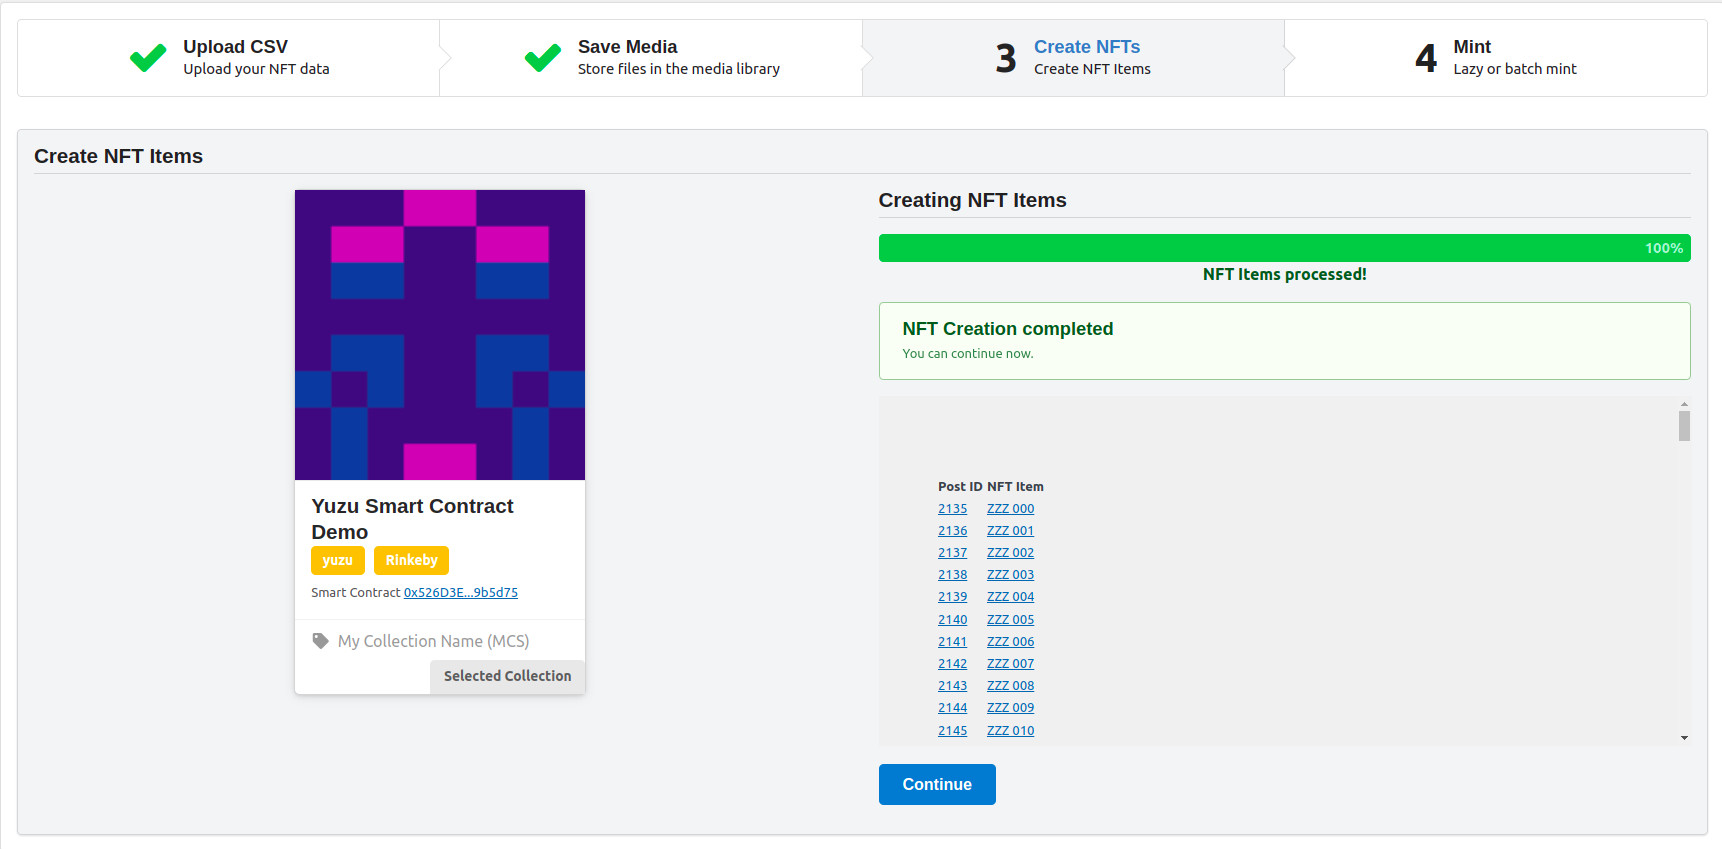
In this step the NFTs items will be created in the database, storing the name, description, media link, attributes and categories.
Also the NFT json endpoint will be generated automatically in this step
Just as before the page may automatically reload several times, please be patient, do not reload the page yourself and do not close the browser. Wait for the process to finish.
When finished, you will see all the post created, with two columns:
Check for errors or warnings in the log
When successful, continue to the next step.
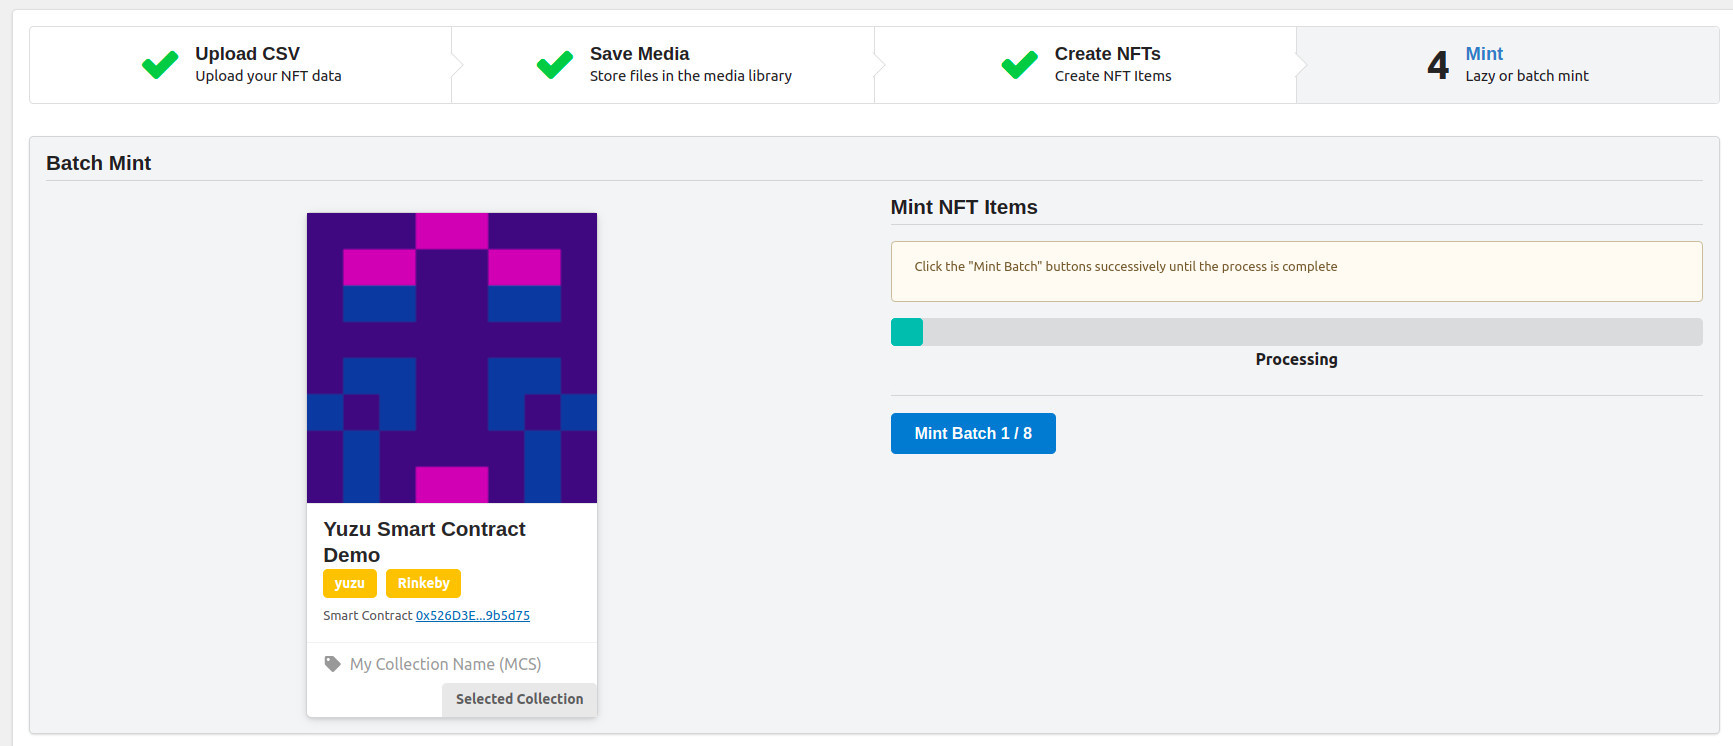
Now, in the last step we are going to mint the items into the Blockchain
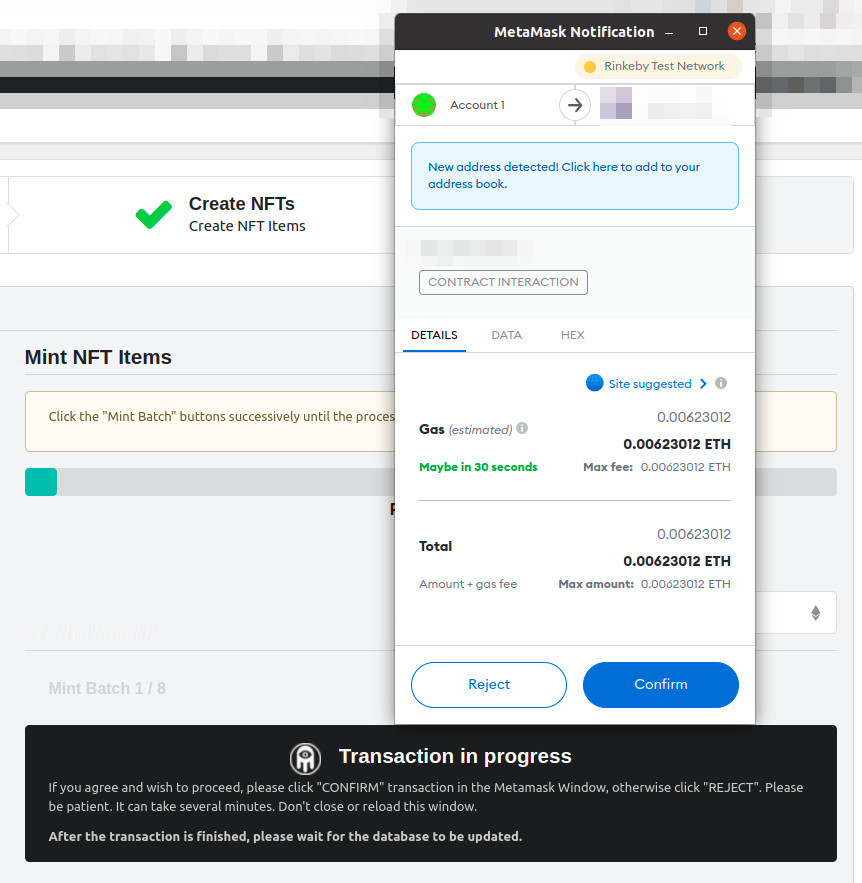
This is a process that has to be done several times manually pressing the "Mint Batch 1/x" button, confirming the Metamask transaction and repeat the process until is over
The wizard process around a hundred items on every mint, this is because the amount of data that can be sent to a Blockchain transaction is limited. But minting a hundred items at a time is far more easier than minting them one by one.

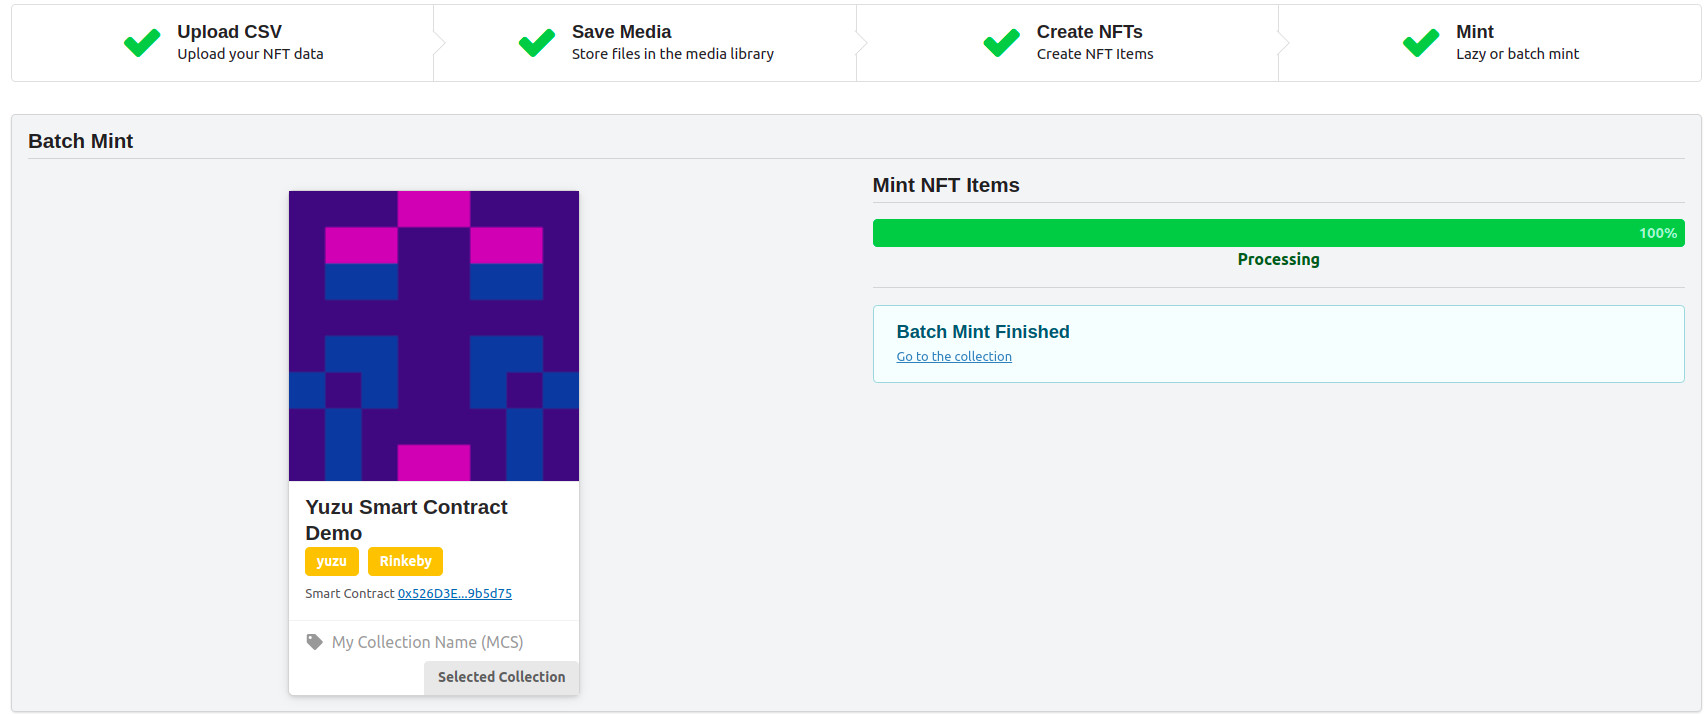
When the transaction is finished, you will see the next mint button available, repeat this process until all items are minted.
When finished you can go to the collection clicking on the link provided
$35,000,000+
Smart Contracts Value Locked
44,800+
WordPress Downloads
2,000+
Mainnet Deployments
13
Smart Contracts Available
6
Different Blockchains
4+
Wallets